Kernel (Mask, Filter)
Morphology includes operations that modify the shape of objects in images. In addition to the image, a kernel is needed, which in practice is a matrix, by which not only the pixel but also its surroundings are examined at the same time. The surroundings of the pixel are the other pixels covered by the kernel. Another name for the kernel may be mask or filter.
Erosion
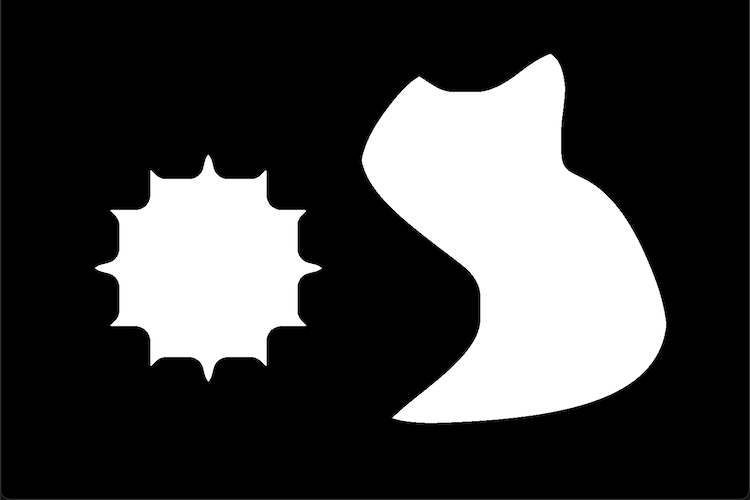
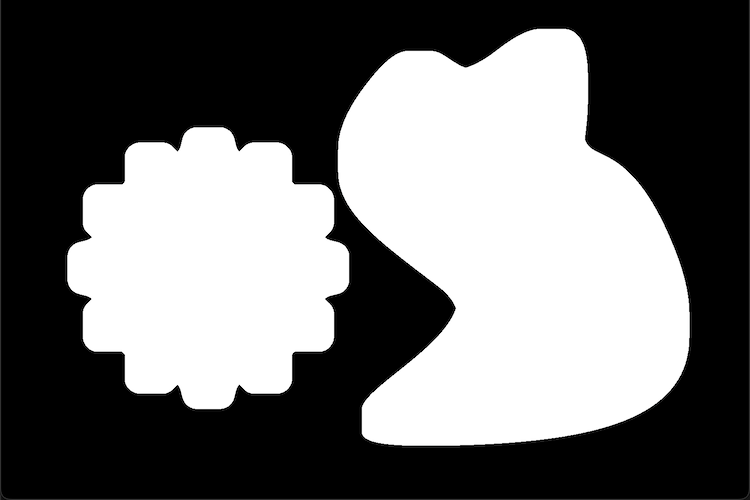
It aims to slim down objects. For each pixel in the image, the minimum value under the kernel will be the new value, so a white pixel will become black if there is at least one black pixel in its neighbourhood. Black pixels will obviously remain black. White pixels around the object will disappear, making it slimmer.

Dilation
Objects are grown in a way that the highest value under the kernel at each pixel will be the value of the pixel that is being processed. White pixels remain white and black pixels are turned white if there is at least one white pixel in their neighbourhood. New white pixels are created around objects, so they grow.
Opening, Closing
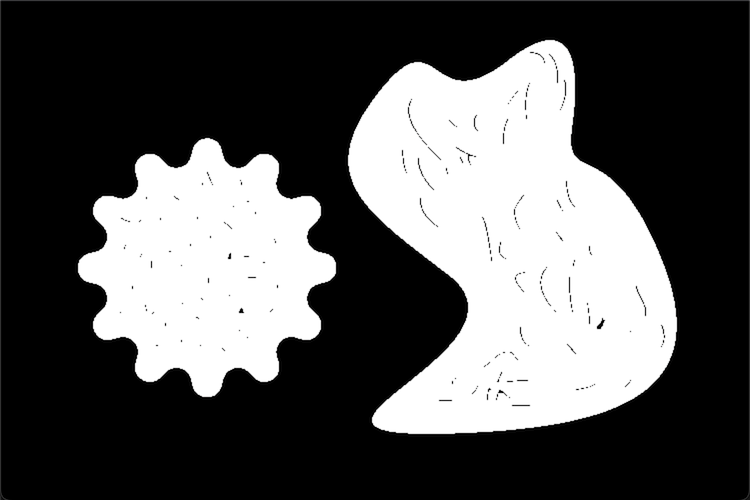
Performing an Erosion followed by a Dilation is the Opening operation. It removes noise around objects, from the background. Closing is a Dilation followed by an Erosion to remove noise within an object, meaning that it removes unwanted black pixels from white areas. The two together is able to remove all noise.

Help
Install scikit-image: https://pypi.org/project/scikit-image
Gears image: Download
Noisy gears image: Download
Source code: Erosion, Dilation
from PIL import Image
import numpy as np
import matplotlib.pyplot as plt
from skimage.morphology import erosion, dilation

# Open the image using PIL
image = Image.open("path-to-resources/gears.jpeg").convert("L")

# Convert image to a NumPy array
data = np.array(image, dtype=np.uint8)

# Apply thresholding
threshold = 128
data = np.where(data > threshold, 0, 1)

custom_footprint = np.array([[1, 1, 1, 1, 1, 1, 1],
                             [1, 1, 1, 1, 1, 1, 1],
                             [1, 1, 1, 1, 1, 1, 1],
                             [1, 1, 1, 1, 1, 1, 1],
                             [1, 1, 1, 1, 1, 1, 1],
                             [1, 1, 1, 1, 1, 1, 1],
                             [1, 1, 1, 1, 1, 1, 1]], dtype=np.uint8)

# Set pixels to the minimum in their neighborhood
eroded_image = erosion(data, custom_footprint)
# Set pixels to the maximum in their neighborhood
dilated_image = dilation(data, custom_footprint)

# Display images
fig, ax = plt.subplots(1, 2, figsize=(12, 6))
ax[0].imshow(eroded_image, cmap="gray")
ax[0].set_title("Eroded Image")
ax[0].axis("off")
ax[1].imshow(dilated_image, cmap="gray")
ax[1].set_title("Dilated Image")
ax[1].axis("off")
plt.show()
Source code: Opening, Closing
from PIL import Image
import numpy as np
import matplotlib.pyplot as plt
from skimage.morphology import  opening, closing

# Open the image using PIL
image = Image.open("path-to-resources/noisy-gears.jpeg").convert("L")

# Convert image to a NumPy array
data = np.array(image, dtype=np.uint8)

# Apply thresholding
threshold = 128
data = np.where(data > threshold, 0, 1)

custom_footprint = np.array([[1, 1, 1, 1, 1, 1, 1],
                             [1, 1, 1, 1, 1, 1, 1],
                             [1, 1, 1, 1, 1, 1, 1],
                             [1, 1, 1, 1, 1, 1, 1],
                             [1, 1, 1, 1, 1, 1, 1],
                             [1, 1, 1, 1, 1, 1, 1],
                             [1, 1, 1, 1, 1, 1, 1]], dtype=np.uint8)

# Perform an erosion followed by a dilation
opened_image = opening(data, custom_footprint)
# Perform a dilation followed by an erosion
closed_image = closing(data, custom_footprint)

# Display images
fig, ax = plt.subplots(1, 2, figsize=(12, 6))
ax[0].imshow(opened_image, cmap="gray")
ax[0].set_title("Opened Image")
ax[0].axis("off")
ax[1].imshow(closed_image, cmap="gray")
ax[1].set_title("Closed Image")
ax[1].axis("off")
plt.show()